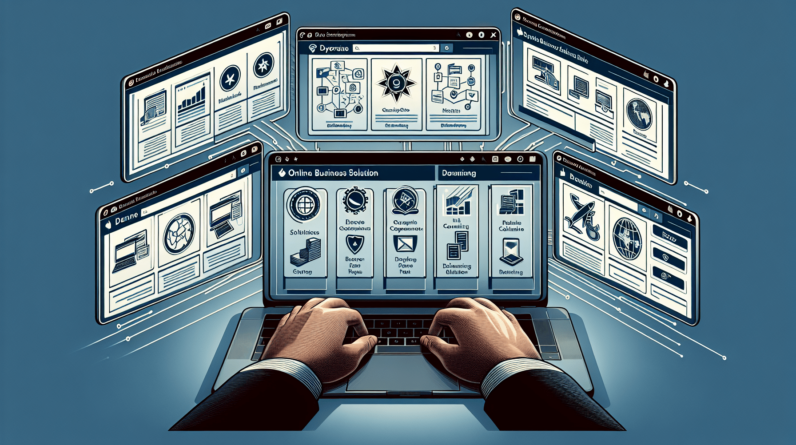
Setting up Systeme.io can be a breeze when you follow the step-by-step process. Whether you’re an online business owner looking for an all-in-one platform or a digital marketer searching for a reliable tool, Systeme.io offers the perfect solution. With its master resell rights, you can easily customize and resell the platform to your clients, making it a lucrative venture. In this article, we will guide you through the simple process of setting up Systeme.io, so that you can start maximizing its potential and growing your business.

Signing Up for Systeme.io
Accessing the Systeme.io Website
To sign up for Systeme.io, the first step is to access the Systeme.io website. Simply open your internet browser and type in the URL for the Systeme.io homepage. Once the website loads, you will be ready to proceed with signing up.
Clicking on the ‘Sign Up’ Button
On the Systeme.io homepage, locate the ‘Sign Up’ button. It is usually prominently displayed on the top right corner of the page. Click on this button to begin the sign-up process.
Choosing a Plan
After clicking on the ‘Sign Up’ button, you will be redirected to a page where you will need to choose a plan. Systeme.io offers various plans to cater to different business needs and budgets. Take your time to review the features and pricing of each plan and select the one that best suits your requirements.
Entering Personal Information
Once you have chosen a plan, you will be directed to a registration form where you will need to enter your personal information. This may include your full name, email address, and any other required details. Ensure that you provide accurate information as it will be used to create your Systeme.io account.
Completing the Registration Process
After entering your personal information, carefully review the terms and conditions and privacy policy of Systeme.io. If you agree, check the box to indicate your acceptance. Finally, click on the ‘Create Account’ or ‘Sign Up’ button to complete the registration process. Congratulations, you are now a registered user of Systeme.io!
Exploring the Systeme.io Dashboard
Logging In to the Systeme.io Account
To access the Systeme.io dashboard, you will need to log in to your account. Return to the Systeme.io website and locate the ‘Log In’ button, usually located on the top right corner of the homepage. Click on this button and enter your login credentials, which typically include your email address and password. Once you have successfully logged in, you will be directed to the Systeme.io dashboard.
Navigating to the Dashboard
Once logged in, you will be greeted with the Systeme.io dashboard. This is the central hub where you can manage all aspects of your online business. Take a moment to familiarize yourself with the layout and navigation of the dashboard. You will find various menu options and sections that allow you to create, manage, and track different elements of your business.
Understanding the Menu Options
The Systeme.io dashboard has a user-friendly interface that offers a range of menu options to help you navigate through the platform. Some of the key menu options you will find include sales funnels, email marketing, contacts and subscribers, integrations, membership areas, affiliate programs, analytics, and master resell rights. Each section corresponds to a specific aspect of your online business and provides tools and features to facilitate efficient management.
Viewing Account Information
Within the Systeme.io dashboard, you can easily access and view your account information. This includes details such as your current plan, billing information, and any subscription or upgrade options available to you. By regularly reviewing your account information, you can ensure that your subscription remains up to date and make any necessary adjustments to optimize your usage of Systeme.io.
Accessing Help and Support
If you ever have questions or encounter any issues while using Systeme.io, rest assured that help and support is readily available. Within the dashboard, you will find a dedicated section for accessing help and support resources. Here, you can access the knowledge base, which contains articles and tutorials to guide you through various aspects of using Systeme.io. Additionally, you can reach out to the Systeme.io support team for assistance via email or live chat.
Setting Up Sales Funnels
Creating a New Sales Funnel
Sales funnels are a crucial component of any successful online business. Within the Systeme.io dashboard, you can easily create and manage your sales funnels. To create a new sales funnel, navigate to the sales funnels section and click on the ‘Create New Funnel’ button. This will initiate the process of setting up your sales funnel.
Naming the Funnel
After clicking on ‘Create New Funnel’, the first step is to give your funnel a name. Choose a name that is descriptive and reflective of the purpose or theme of your funnel. This will help you easily identify and manage your funnels within the dashboard.
Selecting a Funnel Template
Systeme.io provides a selection of professionally designed funnel templates to choose from. These templates serve as a starting point and can be customized to align with your branding and business goals. Browse through the available funnel templates and select the one that best suits your requirements. You can always modify the template later to match your specific needs.
Customizing the Funnel
Once you have selected a funnel template, it’s time to customize it to suit your brand and offer. Systeme.io offers a user-friendly drag-and-drop editor that allows you to easily modify the layout, design, and content of your funnel pages. Customize the colors, fonts, images, and text to create a visually appealing and cohesive funnel that resonates with your target audience.
Adding Products and Payment Options
In order to sell products or services through your sales funnel, you need to add them to your funnel pages. Within the Systeme.io dashboard, you can easily upload and manage your products. Simply follow the prompts to add your products, set their prices, and configure the payment options. Systeme.io seamlessly integrates with popular payment gateways, making it easy to accept payments from your customers.
Configuring Email Integrations
Effective email marketing is essential for nurturing leads and converting them into customers. Systeme.io offers powerful email marketing capabilities that you can integrate into your sales funnels. By connecting your email marketing service provider, you can create email sequences, automate follow-ups, and segment your contacts for targeted communication. Configure your email integrations within the Systeme.io dashboard to maximize the effectiveness of your sales funnels.
Designing the Funnel Pages
The design and layout of your funnel pages play a significant role in capturing and retaining the attention of your audience. Within the Systeme.io dashboard, you can visually design your funnel pages to create an engaging and persuasive user experience. Utilize the drag-and-drop editor, choose from a library of pre-designed elements, and customize the page elements to align with your branding. By creating visually appealing and user-friendly funnel pages, you can enhance conversions and generate more sales.
Publishing the Sales Funnel
Once you have customized your sales funnel to your satisfaction, it’s time to publish it and make it accessible to your audience. Within the Systeme.io dashboard, you can easily publish your funnel with a few simple clicks. Systeme.io provides a unique URL for each funnel, allowing you to promote and share it with your target audience. By publishing your sales funnel, you are one step closer to driving traffic, generating leads, and growing your online business.
Building Email Marketing Campaigns
Accessing the Email Marketing Section
Email marketing is a powerful tool for nurturing and engaging your audience. Within the Systeme.io dashboard, you can access a dedicated email marketing section that allows you to create and manage your email campaigns. This section provides a range of tools and features to help you design, automate, and track your email marketing efforts.
Creating a New Email Campaign
To create a new email campaign, navigate to the email marketing section and click on the ‘Create New Campaign’ button. This will initiate the process of setting up your email campaign.
Setting the Campaign Name and Target Audience
The first step in creating an email campaign is to provide a name for your campaign. This name will help you identify and differentiate it from other campaigns within your dashboard. Additionally, you will need to define the target audience for your campaign. This could be a specific segment of your contact list or a broader audience based on certain criteria. Clearly define your target audience to ensure your email campaign reaches the right recipients.
Composing Email Messages
The heart of your email campaign lies in the email messages you send to your audience. Systeme.io provides an intuitive email editor that allows you to easily compose visually appealing and impactful email messages. Customize the layout, add compelling content, and utilize branding elements to create emails that resonate with your audience. Remember to keep your messages concise, clear, and relevant to maximize engagement and conversions.
Adding Personalization and Dynamic Tags
Personalization is a key element in effective email marketing. Systeme.io allows you to personalize your email messages by using dynamic tags. These tags pull information from your contact list and automatically populate into your emails, creating a personalized experience for each recipient. Addressing your audience by their name and tailoring the content to their specific interests can significantly improve the effectiveness of your email campaigns.
Configuring Automation and Triggers
Automation is a time-saving feature that allows you to set up automated email sequences and triggers. Within the Systeme.io email marketing section, you can easily configure automation rules to ensure your subscribers receive relevant and timely emails. Set up triggers based on specific actions or behaviors, such as email opens, link clicks, or purchases. By automating your email campaigns, you can nurture leads, build relationships, and drive conversions on autopilot.
Scheduling and Sending Email Campaigns
Before sending out your email campaign, take time to review and test your emails to ensure they are error-free and deliver the intended message. Systeme.io allows you to schedule your email campaigns to be sent at specific times or dates. This feature is useful for ensuring your emails reach your audience at the most optimal times, increasing the likelihood of engagement and conversions. Once you are satisfied with your email campaign, schedule it for sending, and watch your engagement metrics soar.
Managing Contacts and Subscribers
Importing Contact Lists
Managing your contacts and subscribers is essential for effective email marketing. Systeme.io provides a simple process for importing contact lists into your dashboard. From the contacts and subscribers section, click on the ‘Import Contacts’ button and follow the prompts to upload your contact list. Ensure that your contact list is in a compatible format, such as a CSV or Excel file, to facilitate smooth importing.
Creating Tags and Segments
Tags and segments are powerful tools for organizing your contact list and sending targeted email campaigns. Within Systeme.io, you can create tags and segments based on specific criteria or characteristics. Tags allow you to categorize contacts based on their interests, behavior, or purchase history, while segments enable you to group contacts with similar attributes or preferences. Utilizing tags and segments helps you send personalized, relevant emails to specific subsets of your audience.
Adding Contacts Manually
In addition to importing contact lists, Systeme.io allows you to add contacts manually. From the contacts and subscribers section, click on the ‘Add Contact’ button and fill out the necessary information for each contact. This is particularly useful when you want to add individual contacts or update the details of existing contacts. By manually adding contacts, you have complete control over your contact list and can tailor your communication accordingly.
Filtering and Searching Contacts
As your contact list grows, efficiently managing and locating specific contacts becomes crucial. Systeme.io provides various filtering and search options to help you find the contacts you need quickly. Filter your contacts based on specific criteria, such as tags, segments, or email engagement. Additionally, use the search bar to enter keywords or contact details to narrow down your search results. By efficiently filtering and searching your contacts, you can save time and ensure that your communications reach the right audience.
Organizing Contacts with Lists
Lists are another valuable feature within Systeme.io that help you organize and manage your contacts. Lists allow you to group contacts based on specific criteria or characteristics. For example, you can create a list for customers who have made a purchase, a list for newsletter subscribers, or a list for prospects who have shown interest in a particular offer. By organizing your contacts with lists, you can easily send targeted communications that resonate with specific groups of contacts.
Integrating Systeme.io with External Services
Accessing the Integrations Section
Systeme.io offers seamless integrations with a range of third-party tools and services to enhance your online business operations. To access the integrations section, navigate to the corresponding menu option within the Systeme.io dashboard. Here, you will find a list of available integrations that you can connect to your Systeme.io account.
Connecting Third-Party Tools and Services
Once you have accessed the integrations section, you can begin connecting your preferred third-party tools and services to Systeme.io. Select the integration you wish to connect and follow the instructions provided. The specific steps may vary depending on the integration, but Systeme.io generally provides a simple and intuitive process for establishing the connection. By integrating external tools and services, you can streamline your workflows and maximize the efficiency of your online business.
Configuring API Keys and Access Permissions
In some cases, to establish a secure and successful integration, you may need to configure API keys and access permissions. Systeme.io provides detailed documentation or instructions for each integration, guiding you through the process of obtaining the necessary API keys and configuring the required access permissions. This ensures that the integration functions smoothly and securely, allowing data and information to flow seamlessly between Systeme.io and your chosen external services.
Creating and Managing Membership Areas
Accessing the Membership Area Module
Membership areas provide a valuable way to deliver exclusive content and privileges to your audience. To access the membership area module within Systeme.io, navigate to the corresponding menu option in the dashboard. Once you enter the membership area module, you will find a range of tools and settings that enable you to create and manage your membership areas.
Designing the Membership Area Pages
Designing visually appealing and user-friendly membership area pages is essential for providing a seamless and engaging user experience. Systeme.io offers easy-to-use design tools that allow you to customize the layout, colors, fonts, and content of your membership area pages. Create a cohesive and branded look by incorporating your logo and visual elements that align with your business identity. By designing captivating membership area pages, you can enhance member satisfaction and increase retention rates.
Setting Up User Registration and Login
To allow users to access your membership areas, you need to set up user registration and login functionality. Within the Systeme.io membership area module, you will find options to configure registration and login forms. Customize the form fields and set any necessary permissions or restrictions for user registration. By enabling smooth and secure access to your membership areas, you can optimize the user experience and strengthen your member community.
Creating and Restricting Access to Content
Membership areas provide an opportunity to offer exclusive content or resources to your members. Within Systeme.io, you can easily create and organize this content. Upload files, create text-based content, or embed multimedia elements to enhance the value and engagement of your membership areas. Additionally, Systeme.io offers options to restrict access to specific content based on a member’s subscription level, purchase history, or other predetermined criteria. By strategically managing content access, you can incentivize subscriptions and enhance the perceived value of your membership areas.
Managing Members and Subscriptions
Effective management of your membership areas requires tools to monitor and manage your members and their subscriptions. Within Systeme.io, you will find features to track member activity, view subscription statuses, and manage membership renewals or cancellations. Utilize these features to ensure a smooth and organized membership experience for your members. By actively managing your members and subscriptions, you can foster strong relationships, address any concerns or issues promptly, and retain satisfied members.
Setting Up Affiliate Programs
Accessing the Affiliate Program Module
Affiliate programs can significantly amplify your marketing efforts by enlisting affiliates to promote your products or services. To set up an affiliate program within Systeme.io, navigate to the corresponding menu option in the dashboard. The affiliate program module offers a range of tools and settings that allow you to create, manage, and track your affiliate program.
Enabling the Affiliate Program
Once inside the affiliate program module, you can enable your affiliate program by following the provided instructions. Define the commission structure, referral tracking parameters, and any additional program rules or terms. Systeme.io provides options to customize the affiliate registration process and configure access permissions. By enabling your affiliate program, you are extending the reach of your business and incentivizing others to promote your offerings.
Designing Affiliate Pages and Resources
To support your affiliates and enhance their promotional efforts, it is important to provide them with dedicated affiliate pages and resources. Within Systeme.io, you can design and personalize affiliate pages to align with your branding and offer all the necessary information and resources for your affiliates. This could include promotional materials, product information, commission rates, and payout details. By equipping your affiliates with valuable resources, you enhance their effectiveness and foster a collaborative affiliate community.
Configuring Commission Rates and Payouts
Commission rates and payout settings are central to your affiliate program. Systeme.io offers options to define commission rates based on specific criteria or actions, such as sales, leads, or recurring subscriptions. Additionally, you can configure payout schedules and methods to ensure timely and accurate payments to your affiliates. By setting competitive commission rates and transparent payout systems, you can attract and motivate quality affiliates to promote your offerings.
Tracking and Monitoring Affiliate Performance
To gauge the success and effectiveness of your affiliate program, it is crucial to track and monitor affiliate performance. Systeme.io provides built-in tracking and reporting features that allow you to analyze affiliate-generated traffic, conversions, and revenue. Monitor key metrics such as clicks, referrals, sales, and commissions to identify top-performing affiliates and optimize your program. By actively tracking and analyzing affiliate performance, you can refine your strategies and build strong and productive relationships with your affiliates.
Monitoring and Analyzing Website Performance
Accessing the Analytics Section
To effectively monitor and analyze your website’s performance, Systeme.io offers a comprehensive analytics section within the dashboard. Access it by clicking on the corresponding menu option. Within the analytics section, you will find a wealth of data, insights, and reports that provide valuable information about your website’s traffic, conversions, and revenue.
Viewing Website Traffic and Visitors
Understanding your website’s traffic and visitors is essential for evaluating the effectiveness of your marketing efforts. Within the Systeme.io analytics section, you can view detailed reports on website traffic, visitor demographics, and the sources of your traffic. Monitor key metrics such as page views, unique visitors, and bounce rates to assess the popularity and engagement of your website. By analyzing website traffic and visitor data, you can identify opportunities for optimization and growth.
Analyzing Conversion Rates
Conversion rates are a pivotal indicator of your website’s effectiveness in driving desired actions from your visitors. Within the Systeme.io analytics section, you can analyze conversion rates for various actions, such as email sign-ups, product purchases, or membership subscriptions. Understand the flow of your visitors through your sales funnels and identify any bottlenecks or areas that require optimization. By tracking and improving conversion rates, you can maximize your opportunities for revenue generation and business growth.
Monitoring Sales and Revenue
Tracking your sales and revenue is fundamental to understanding the financial performance of your online business. Systeme.io offers comprehensive reports and dashboards that provide an overview of your sales, revenue, and customer acquisition. Analyze your sales data to identify trends, evaluate the performance of your sales funnels and campaigns, and make data-driven decisions to optimize your revenue generation. By effectively monitoring your sales and revenue, you can implement strategies to enhance profitability and drive business growth.
Identifying Top Performing Funnels and Campaigns
Systeme.io analytics allow you to drill down into the performance of your sales funnels and email marketing campaigns. Identify your top-performing funnels and campaigns based on metrics such as conversion rates, revenue generated, or customer engagement. By analyzing the success factors of these high-performing elements, you can replicate their strategies and tactics across your business. Utilize these insights to optimize your marketing efforts, drive more conversions, and increase your overall business performance.
Utilizing Systeme.io Master Resell Rights
Understanding Systeme.io Master Resell Rights
Systeme.io offers a unique feature called master resell rights, allowing you to leverage the platform’s products and packages to generate revenue. With master resell rights, you can sell digital products created by Systeme.io and keep the profits for yourself. This feature enables you to tap into a wide range of high-quality products without the need to develop or create your own.
Accessing the Master Resell Rights
To access the master resell rights within Systeme.io, navigate to the corresponding section in the dashboard. Here, you will find an extensive library of digital products that you can resell to your audience. Explore the available products and packages to identify those that align with your business niche or target audience.
Exploring Available Products and Packages
The Systeme.io master resell rights library offers a diverse range of products and packages spanning various niches and industries. Browse the available products to find e-books, courses, templates, software, or other digital resources that resonate with your target audience. Take time to explore the different packages, pricing options, and product details to ensure you select the right products to resell.
Using and Customizing Master Resell Rights Products
Once you have chosen the products or packages you wish to resell, you can begin leveraging them within your business. Systeme.io provides options to personalize and customize the products with your branding or modifications. Make necessary adjustments to align the products with your business identity or unique selling propositions. By customizing the master resell rights products, you enhance their value and make them more appealing to your target audience.
By following the above step-by-step process, you can effectively sign up for Systeme.io, explore the dashboard, create sales funnels, build email marketing campaigns, manage contacts and subscribers, integrate with external services, create membership areas, set up affiliate programs, monitor website performance, and utilize the master resell rights feature of Systeme.io. With each section and feature that you explore and utilize, you can enhance your online business operations, drive more conversions, and achieve greater success.